Ashtanga Yoga is a dynamic, disciplined system that links breath, movement, and focused attention into a flowing sequence of postures. Practitioners follow a fixed series of asanas while synchronizing Ujjayi breath and bandhas, creating a moving meditation that builds strength, flexibility, and mental clarity.
This article explains the structure of the Series, essential asanas, alignment cues, and practical sequencing for sustainable progress. It also covers safety, modifications, and ways to integrate Ashtanga into daily life. Whether you are a beginner curious about structure or an experienced student seeking refinement, this guide offers clear, actionable insights to deepen your practice. Expect measurable results with consistent practice and mindful attention to detail, daily commitment.
Therapy Essential
Amazon.com
10-Loop Non-Elastic Stretching Strap for Flexibility
50 Essential Beginner Yoga Poses for Beginners: Simple, Accessible Yoga
1
Foundations of Ashtanga: Philosophy, Principles, and Practice
The eight limbs in everyday practice
Ashtanga springs from Patanjali’s eight-limbed path, but it’s not only philosophy—it’s practical scaffolding. Moral disciplines (yama/niyama) shape behavior; asana and pranayama prepare the body and breath; dharana and dhyana evolve naturally from the repeated, focused movement. Think of the Series as a laboratory where ethical intention, posture, and breath train attention.
Core techniques: vinyasa, ujjayi, bandhas, and drishti
The visible signature of Ashtanga is vinyasa—every movement tied to an inhalation or exhalation. Ujjayi breathing (a slightly constricted throat sound) steadies the nervous system and sets tempo. Bandhas (mula and uddiyana primarily) are internal “locks” that create lift and core stability. Drishti—fixed gaze points—anchors concentration through heat and fatigue.
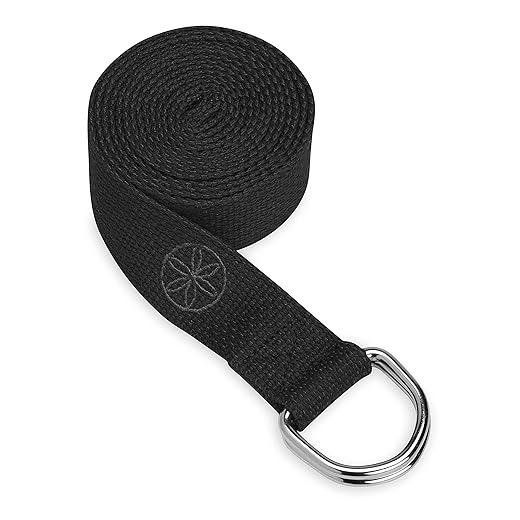
Editor's Choice
Premium D-Ring Yoga Strap with Secure Buckle
Top choice for adjustable, secure stretches
A reinforced polyester yoga strap with a double metal D-ring cinch buckle that holds securely and releases easily for safe stretching. Available in multiple lengths to deepen poses and improve alignment without slipping.
Ujjayi: breathe through the nose with a soft throat constriction; match inhale/exhale lengths.
Bandhas: on exhale, draw the lower belly gently toward the spine; lift the pelvic floor subtly.
Drishti: choose one focal point (nose tip, thumb in Utthita Trikonasana) and return when the mind wanders.
Why repetition and daily practice matter
Progress in Ashtanga comes from repetition, not novelty. Repeating the same sequence builds proprioception, refines alignment, and converts effort into smooth, efficient movement. Many practitioners notice improved focus and steadier moods after a month of consistent practice—small neurological shifts from habitual breath-movement coordination.
How Ashtanga differs from free-form styles
Unlike open-ended, class-to-class variations, Ashtanga’s fixed sequences create measurable benchmarks: you either lock into a pose this week you couldn’t last month. That structure fosters discipline and predictable progression, while still allowing personalized adjustment for anatomy and injury.
Quick starter actionables
Commit to 10–20 minutes daily; focus on quality of breath over depth of stretch.
Begin with 3 rounds of Sun Salutation A, counting breath and maintaining drishti.
Journal one observation each session (energy, mood, tightness).
Next, we’ll unpack the Series itself—how the Primary, Intermediate, and Advanced sequences are organized and why that order matters.
2
Structure and Sequences: The Series and How They Work
The three Series — what each trains
Ashtanga is organized into three main progressive Series: Primary (detoxifies and aligns), Intermediate (opens the spine and nervous system), and Advanced (strength, agility, and refinement). Each sequence targets different physical and mental capacities: Primary builds steadiness and flexibility; Intermediate cultivates openness and resilience; Advanced integrates strength, balance, and refined attention. Think of them as curricular levels in a conservatory rather than arbitrary difficulty tiers.
Standard class flow — the backbone of every practice
A typical Ashtanga session follows a predictable arc that balances heat, focus, and recovery:
Opening/centering and a few preparatory poses
Sun Salutation A and B to build warmth and rhythm
Standing sequence to establish alignment and endurance
Seated sequence for deep flexibility and sequencing of binds
Backbends when appropriate, followed by finishing poses and Savasana
This progression moves from large dynamic movement to focused, passive holds—helpful when sequencing your own home practice.
Best Value
Extra-Thick 1/2-Inch Cushioned Exercise Yoga Mat
Best for heavy cushioning and joint support
An extra-thick 1/2-inch NBR foam mat that provides plush padding and shock absorption for yoga, gym, and floor exercises. The textured surface improves traction and it includes an elastic strap for easy carrying.
Sun A and B are the scaffolding: compact routines that raise internal temperature and sync breath with movement. Vinyasa transitions (chaturanga, upward/downward dog) are the connective tissue—each is counted and deliberate, turning pose-to-pose travel into a meditative, strength-building rhythm.
Led classes vs. Mysore/self-practice
Led class: teacher calls the sequence aloud; good for beginners to learn order and pacing.
Mysore: self-paced within a group; students progress individually while the teacher gives hands-on adjustments.
Many students start in led classes, then move to Mysore as they internalize the sequence.
Practical progression tips
Learn one new pose at a time; master transitions first.
Record which verses/poses you can do and revisit monthly.
Be patient—progress is linear only in hindsight.
Next we’ll explore the essential asanas that populate these sequences and practical alignment cues.
3
Essential Asanas: Key Poses, Goals, and Alignment Cues
A practical map to the “must-know” poses that recur in every Ashtanga class. Below are representative asanas grouped by where they appear in the sequence, with clear goals, alignment principles, common mistakes, and short cues you can use on the mat.
Goal: steady breath, even heat, clean vinyasa mechanics.
Alignment: neutral pelvis, engaged core, long spine through chaturanga.
Mistake: collapsing through low back or flaring ribs. Cue: “zip belly, tail toward heels.”
Trikonasana / Parivrtta Trikonasana
Goal: length through both sides of the torso, stable feet.
Alignment: square hips (as much as anatomy allows), single-line spine to extended arm.
Mistake: rounding the chest. Cue: “lift the top rib, reach from the hip.”
Forward bends & seated hamstring work
Uttanasana / Paschimottanasana
Goal: long spine before folding, relaxed neck.
Alignment: hinge from hips, micro-bend in knees if needed to protect hamstrings.
Mistake: collapsing into lumbar flexion. Cue: “lead with chest, soften knees.”
Twists & binds
Ardha Matsyendrasana / Marichyasana
Goal: rotation from the thoracic spine, stable pelvis.
Alignment: lengthen spine on inhale, twist on exhale; use strap for bind.
Mistake: forcing twist from lower back. Cue: “stack vertebrae, turn the torso.”
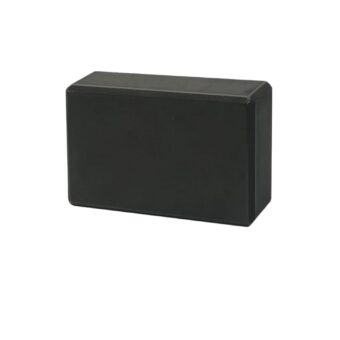
Must-Have
Beveled Non-Slip EVA Foam Yoga Block
Best for stability, alignment, and modified poses
A lightweight, durable EVA foam block with beveled edges and a non-slip surface to support alignment and deepen stretches. Ideal for yoga, pilates, meditation, and safely modifying poses across skill levels.
Use props: Hugger Mugger cork block for elevated folds, Jade Yoga strap for binds, Manduka PRO mat for sticky stability.
Drill negatives and partial reps (e.g., eccentric lowering into arm balance).
Example: a student opened to full Padmasana over 6 months by combining weekly lotus prep, daily 2–3 minute seated hip releases, and a strap-assisted bind progression.
Class formats & how new poses are introduced
Mysore-style: self-paced with individualized instruction. Ideal for steady, injury-aware progress.
Led classes: rhythm and unity; teachers often demonstrate a new pose in stages, give regressions, then cue it in sequence.Teachers typically introduce new asanas with demonstration, hands-on adjustments, and “homework” cues to practice outside class.
Timelines (realistic)
Simple variations: 2–6 weeks.
Moderate binds/arm balances: 2–6 months.
Complex backbends/inversions/personal peak poses: many months to years.
Move at a pace your body can recover from — consistency compounds progress.
5
Safety, Modifications, and Managing Common Challenges
Common vulnerabilities and quick prevention
Ashtanga’s dynamic nature stresses specific areas—wrists, shoulders, lower back, knees, neck. Simple prevention reduces most injuries:
Warm shoulders and wrists with external-rotation and wrist circles before full weight-bearing.
Maintain neutral spine in forward folds and avoid forcing depth.
Keep knees tracking over toes; don’t torque into deep twists with locked knees.A student I taught with acute wrist pain swapped to fists for three weeks and rebuilt strength with slow plank variations—no surgery, just consistent care.
Modifications and prop-driven options
Use props and partial ranges to stay in practice while protecting tissue:
Blocks: Hugger Mugger or Yoga Design Lab cork blocks for raised forward folds and supported standing balances.
Straps: Manduka Align or Hugger Mugger strap for bind progressions without overstretching.
Bolster/blankets: Hugger Mugger Standard bolster for supported backbends and restorative rests.
Replace full Chaturanga with knees-chest-chin or forearm plank when wrists/shoulders are sore.
Skip jump-throughs/jump-backs; step back slowly.
Limit end-range spinal rotations; use half-lifts instead of deep backbends.
Breath, bandha, and fatigue adjustments
When pain or exhaustion appears, downregulate safely:
Soften ujayi slightly—maintain steady, calm inhale/exhale rather than forceful sound.
Relax strong mula and uddiyana bandha; engage gently or not at all if it causes strain.
Avoid breath retention (kumbhaka) when dizzy, hypertensive, or overly fatigued.
Contraindications and red flags
Avoid or modify practice with:
Recent surgeries, acute injuries, uncontrolled hypertension, pregnancy without prenatal approval, detached retina/glaucoma risks—consult an OB/GYN/MD.Seek medical/teacher help for: persistent intense pain >72 hours, swelling, numbness, weakness, or loss of function.
Restorative alternatives to maintain continuity
If you must pause the series, try:
15–30 minutes restorative sequence with bolster and blankets (supported Child, Legs-Up-Viparita Karani).
Gentle Yin or slow vinyasa focusing on mobility and breath.These keep habit and resilience while tissues heal.
6
Integrating Ashtanga Into Daily Life: Habits, Complementary Practices, and Resources
Build a realistic routine
Start small and specific. Aim for consistency over duration: three 30–60 minute practices per week beats one perfect 90‑minute session. Try a morning window (e.g., wake +30–90 minutes) or an evening short practice when mornings don’t work. Track with a simple journal entry after each session:
Date, time, series/sequence, duration, notes on pain/energy, one goal for next time
Balance intensity with rest
Alternate hard days with gentle recovery:
Hard Ashtanga day → next day: restorative yoga, mobility work, or complete rest.
Schedule 1–2 full rest days weekly.A student I taught reduced elbow pain by swapping every third practice for 20 minutes of mobility and a 15‑minute restorative sequence—progress resumed without setbacks.
Complementary practices (what to add and why)
Strength training: 2x/week full‑body (posterior chain focus). Equipment: Rogue kettlebells or adjustable dumbbells for practical home strength.
Mobility: 10–15 minutes after practice with resistance bands (TheraBand) for targeted shoulders/hips.
Recovery tools: Theragun Mini or lacrosse ball for tight spots.
Restorative yoga: bolsters/blankets (Hugger Mugger bolster) for nervous system reset.
Off-the-mat deepening
Breathwork: daily 5–10 minutes of Nadi Shodhana (alternate nostril) or gentle ujjayi to steady mind.
Meditation: 5–20 minutes (Insight Timer, Calm) — start with breath awareness or body scan.
Look for teachers with lineage training, clear alignment cues, patient adjustments, and class size that allows individual attention. Reliable online resources: Ashtanga.com, Yoga International, Kino MacGregor’s online offerings; supplement with local Mysore‑style classes when possible.
With these habits, tools, and resources in place, you’ll cultivate a sustainable Ashtanga practice that grows with you—leading into practical next steps in the Conclusion.
Bringing It Together: Practical Next Steps
Ashtanga rewards patience, alignment, and consistency—bringing strength, flexibility, focus, and steadiness of breath. Begin practically: try a Mysore class or a guided led session, commit to a sustainable frequency (e.g., three times weekly), and root each practice in breath-linked movement (vinyasa and ujjayi). Prioritize safety: use modifications, props, and rest when needed; consult a teacher for adjustments.
Keep a short practice journal to track time, poses, sensations, and small wins—review monthly to refine goals. Above all, be patient: steady practice compounds. Start simply, stay curious, and let the practice shape your days. If you’re unsure where to begin, reach out to a local studio, try an online Mysore program, or schedule one private with a certified teacher and enjoy progress.
38 thoughts on “Ashtanga Yoga Asanas”
Huge fan of the equipment recommendations — the extra-thick mat recommendation is legit if you sit in meditation after practice. I bought the 1/2-inch cushioned mat and it’s been a lifesaver for my knees.
Also: the bit on common challenges is so real. I laughed at the ‘trying to skip forward in the series like you’re on fast-forward’ line 😂
Long-ish note: – For beginners, focus on breath + alignment before depth. Don’t rush pancake splits. – Use the beveled block under your heel for stable standing poses. It changed my balance game.
(Also, who else uses yoga blocks as random coffee table stands? No? Just me?)
Love the humor! The coffee table block hack is a new one to me 😄 Thanks for the practical tips — very helpful for readers transitioning from beginner to intermediate.
Short and practical. Loved the ‘safety, modifications’ bit — saved me from overstraining last week. One small gripe: the example class structure felt very Ashtanga-traditional; some modern hybrid classes might need more flexible sequencing notes.
Thanks, Marcus — good point. The article focuses on traditional Ashtanga structure but we tried to include notes on adapting sequences for hybrids. I’ll consider adding explicit examples for modern class formats.
I liked the ‘Practical Next Steps’ checklist at the end. Small, actionable items make it less overwhelming. One suggestion: maybe include a short weekly plan (like 3-day beginner schedule) to help people get started.
Really appreciated the ‘Managing Common Challenges’ section. I used the recommended modifications for hamstring tightness and noticed big improvements in a month. The community comments about straps and blocks were also helpful when choosing gear.
Also, major props for calling out ego-led progression — been there, injured that 😬
This guide nailed the sequencing part. I teach a small class and used the ‘building a sustainable practice’ section to revamp my lesson flow. One note: the article mentions using an extra-thick mat for long seated postures — can confirm it’s worth it for knees and tailbone.
Questions from my students: – Are yoga blocks necessary or can I just fold blankets? (I use EVA foam.) – Any recs on straps for someone with limited shoulder mobility?
Thanks for the resources list btw, made shopping easier 😅
Great to hear it helped with your class! Blocks are helpful but blankets can absolutely substitute in many cases — foam blocks are lighter and more stable, though. For limited shoulder mobility, the 10-loop strap is excellent because you can shorten or lengthen easily; D-ring straps are more precise but require more hands-on adjustment.
Quick note from a newbie: I tried the 10-loop strap and it was confusing at first (so many loops!). The article’s explanation helped — start with a longer loop and work inward. Also, the beveled block was clutch for balance work.
Also — small nit: maybe add beginner-level video links? Some of the cues are hard to visualize on text alone.
Great feedback, Carlos — we’ll look into adding beginner video links. The 10-loop strap definitely has a learning curve; starting long is a smart approach.
Totally appreciated the philosophical bits — not too preachy, just enough to ground the practice. Also, quick rant: bought a cheap mat before and regretted it during Salabhasana. Save up for the extra-thick mat, folks. Your spine will thank you.
Also, does anyone have a favorite brand for D-ring straps? The article linked a premium D-ring; curious about durability.
Thanks Liam — durability varies but look for reinforced stitching and a metal buckle. The premium D-ring listed in the article gets good reviews for longevity.
Nice article. Curious: any tips for adapting Ashtanga when you have a history of knee injuries? The safety section covered general stuff but I need specifics — especially for forward folds and binds.
Good question, John. For knees: prioritize micro-bends in standing and seated knee-bearing poses; avoid deep compressive folds if you’re feeling pain. Use blankets or blocks under hips in seated forward folds to reduce pressure, and opt for strap-assisted binds rather than forcing arm positions. If in doubt, consult a physio familiar with yoga.
Question: The article suggests integrating Ashtanga into daily life — any tips for someone with an unpredictable schedule? I can do 10 minutes some days, 60 other days. Will that mess up progress?
Short answer: no, it’s not ruining your progress. Consistency beats duration; even a 10-minute focused practice helps maintain mobility and breath connection. Use shorter drills on busy days (sun salutations + seated twists) and longer practices when time allows.
Good read overall. Felt a bit dense in the philosophy section for a quick how-to article. Would’ve loved a diagram for tricky asanas like Marichyasana C. Still useful for experienced folks though.
This article was the reason I finally bought a foam block — and I actually use it every day. Wish the section on alignment had a few more pictures though. Words are great but visual cues help with tricky positions.


Huge fan of the equipment recommendations — the extra-thick mat recommendation is legit if you sit in meditation after practice. I bought the 1/2-inch cushioned mat and it’s been a lifesaver for my knees.
Also: the bit on common challenges is so real. I laughed at the ‘trying to skip forward in the series like you’re on fast-forward’ line 😂
Long-ish note:
– For beginners, focus on breath + alignment before depth. Don’t rush pancake splits.
– Use the beveled block under your heel for stable standing poses. It changed my balance game.
(Also, who else uses yoga blocks as random coffee table stands? No? Just me?)
Love the humor! The coffee table block hack is a new one to me 😄 Thanks for the practical tips — very helpful for readers transitioning from beginner to intermediate.
The cushioned mat is great but be careful with too-thick mats during standing balances — some slippage can happen.
Yesss the beveled block under the heel = instant improvement. I keep one by the sofa now.
Agree on breath first. Depth will come with consistency.
Totally using a block as a stand now. It’s very utilitarian 😂
Short and practical. Loved the ‘safety, modifications’ bit — saved me from overstraining last week. One small gripe: the example class structure felt very Ashtanga-traditional; some modern hybrid classes might need more flexible sequencing notes.
Thanks, Marcus — good point. The article focuses on traditional Ashtanga structure but we tried to include notes on adapting sequences for hybrids. I’ll consider adding explicit examples for modern class formats.
Yes, a blended model example would be awesome. I teach Ashtanga-influenced vinyasa and always adapt for different levels.
I liked the ‘Practical Next Steps’ checklist at the end. Small, actionable items make it less overwhelming. One suggestion: maybe include a short weekly plan (like 3-day beginner schedule) to help people get started.
Solid suggestion, Ethan. A downloadable 3-week starter plan is a good idea — we’ll consider adding a sample weekly schedule in the next update.
Really appreciated the ‘Managing Common Challenges’ section. I used the recommended modifications for hamstring tightness and noticed big improvements in a month. The community comments about straps and blocks were also helpful when choosing gear.
Also, major props for calling out ego-led progression — been there, injured that 😬
Thanks, Hannah. Ego progression is a classic pitfall — glad the section resonated. Happy your hamstrings improved with the mods.
Injuries from ego are the worst. Slow and steady wins — and props for listening to your body.
Been injured by my ego too. This article’s reminder was timely.
Seconding the importance of mods. Your practice can be long-lived if you respect recovery.
This guide nailed the sequencing part. I teach a small class and used the ‘building a sustainable practice’ section to revamp my lesson flow. One note: the article mentions using an extra-thick mat for long seated postures — can confirm it’s worth it for knees and tailbone.
Questions from my students:
– Are yoga blocks necessary or can I just fold blankets? (I use EVA foam.)
– Any recs on straps for someone with limited shoulder mobility?
Thanks for the resources list btw, made shopping easier 😅
FWIW blocks also help with balance in standing poses. Don’t underestimate their usefulness.
Great to hear it helped with your class! Blocks are helpful but blankets can absolutely substitute in many cases — foam blocks are lighter and more stable, though. For limited shoulder mobility, the 10-loop strap is excellent because you can shorten or lengthen easily; D-ring straps are more precise but require more hands-on adjustment.
For shoulders: try the 10-loop strap and use it to support arm rotations gradually. Also look up ‘threading the needle’ modifications.
I started with a D-ring and then bought a loop strap — both useful. Loop strap felt kinder on my frozen shoulder.
Blankets work in a pinch, but EVA foam blocks are portable and consistent. I carry one in my bag for class swaps.
Quick note from a newbie: I tried the 10-loop strap and it was confusing at first (so many loops!). The article’s explanation helped — start with a longer loop and work inward. Also, the beveled block was clutch for balance work.
Also — small nit: maybe add beginner-level video links? Some of the cues are hard to visualize on text alone.
Yep, videos would seal the deal. Even a few short clips for key poses would be super helpful.
Great feedback, Carlos — we’ll look into adding beginner video links. The 10-loop strap definitely has a learning curve; starting long is a smart approach.
Totally appreciated the philosophical bits — not too preachy, just enough to ground the practice. Also, quick rant: bought a cheap mat before and regretted it during Salabhasana. Save up for the extra-thick mat, folks. Your spine will thank you.
Also, does anyone have a favorite brand for D-ring straps? The article linked a premium D-ring; curious about durability.
Thanks Liam — durability varies but look for reinforced stitching and a metal buckle. The premium D-ring listed in the article gets good reviews for longevity.
I’ve had mine for 3 years with no issues. The metal buckle holds up really well — worth the few extra bucks.
If you prefer less fuss, the 10-loop strap is low-maintenance. No buckle to worry about.
I return straps once they start fraying. Look for cotton blends that don’t fray easily.
Nice article. Curious: any tips for adapting Ashtanga when you have a history of knee injuries? The safety section covered general stuff but I need specifics — especially for forward folds and binds.
Good question, John. For knees: prioritize micro-bends in standing and seated knee-bearing poses; avoid deep compressive folds if you’re feeling pain. Use blankets or blocks under hips in seated forward folds to reduce pressure, and opt for strap-assisted binds rather than forcing arm positions. If in doubt, consult a physio familiar with yoga.
Question: The article suggests integrating Ashtanga into daily life — any tips for someone with an unpredictable schedule? I can do 10 minutes some days, 60 other days. Will that mess up progress?
Short answer: no, it’s not ruining your progress. Consistency beats duration; even a 10-minute focused practice helps maintain mobility and breath connection. Use shorter drills on busy days (sun salutations + seated twists) and longer practices when time allows.
Adaptations like mini-series (5-10 poses) are perfect for unpredictable weeks. Keep a ‘go-to’ short routine.
I do 15 minutes before work most days, and longer on weekends. Keeps the momentum going.
Good read overall. Felt a bit dense in the philosophy section for a quick how-to article. Would’ve loved a diagram for tricky asanas like Marichyasana C. Still useful for experienced folks though.
This article was the reason I finally bought a foam block — and I actually use it every day. Wish the section on alignment had a few more pictures though. Words are great but visual cues help with tricky positions.