Practicing yoga is like other sports. If you want to progress quickly, you must start with small lessons, from basic exercises to help your body gradually become flexible and expand muscles and joints to step-by-step practice with more advanced exercises. Today, Your Beauty & Health would like to introduce nine basic yoga exercises that beginners can practice at home. Let’s explore.
1. Mountain Pose
This is an easy-to-do basic exercise that should be reserved for beginners to get acquainted with yoga. It is an extremely popular yoga pose for beginners at home.
This pose is a foundation for applying other standing poses and inversions found in yoga.
This pose helps straighten the spine, improve your posture, and help you have better posture.
Proceed as follows:
Keep your body upright, arms relaxed, and palms facing inward. Place both feet parallel to the exercise mat. The tips of the feet touch each other, and the heels relax. Lift and spread your toes and the ball of your foot. Avoid putting pressure on your heels and toes.
Squeeze your thigh muscles enough to feel your kneecap (the large bone that covers the front of your knee joint) move up. The lower abdomen is contracted and slightly tense. Raise your inner ankle without letting the sole of your foot lift off the floor. Rotate both knees toward each other with sufficient force. Push your hips forward and up.
Relax your shoulders and spread them out to the sides, using force to lower your shoulders down towards your abdomen. Point your chest forward and lift it toward the ceiling. Palms face inward, fingers relaxed. Keep your head and spine straight.
Keep your eyes looking straight ahead, with your chin parallel to the floor. The facial muscles are relaxed, and the head is aligned with the spine. Breathe evenly for 30 seconds to 1 minute, then end this exercise.
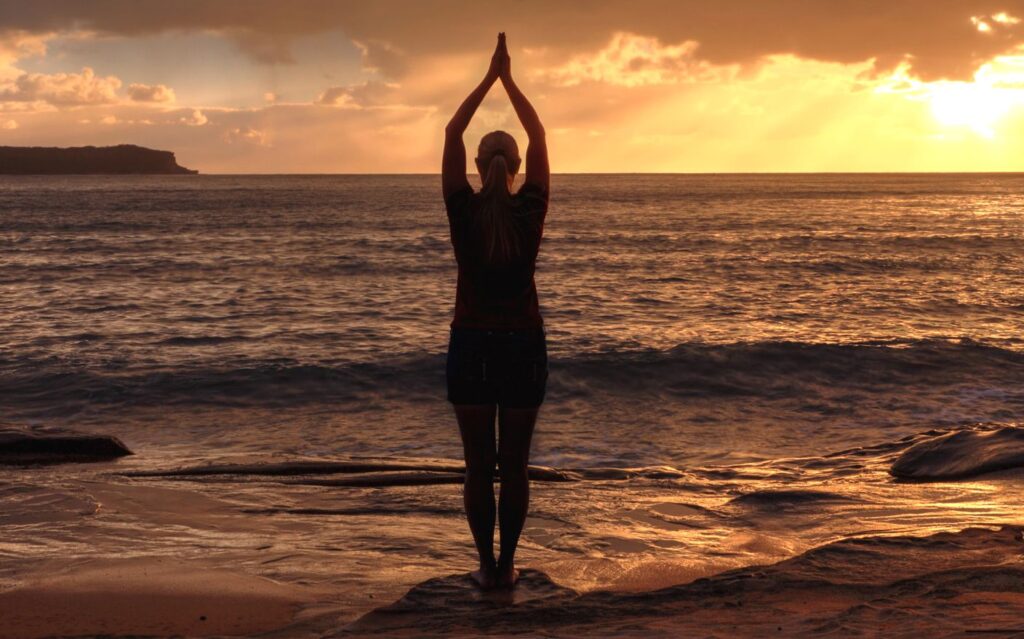
Mountain Pose (Source: Internet)
2. Corpse Yoga Pose
Although this yoga pose is simple, it will help us relax the whole body, soothe the mind, and relieve internal frustrations. At the same time, it restores energy and gives the practitioner a refreshing feeling.
Proceed as follows:
Lie comfortably on the mat, legs spread shoulder-width apart, arms parallel to the body.
Close your eyes, rest, and focus on breathing evenly.
Let your mind and body take a break from fatigue and stress, calm down, and restore energy.
To get out of the pose, slowly shake your fingers and toes and do a few stretching movements of your arms and legs.
Then turn your body to the side and gently push yourself to sit up.
Corpse Yoga Pose (Source: Internet)
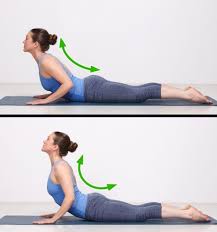
3. Cat-Cow Pose
This pose strengthens the entire back (upper, middle, and lower back) by flexing the spine and increasing its flexibility. It also increases blood flow to the muscular areas of the back and reduces back pain.
Proceed as follows:
From table position (upside do-width table). Your arms are shoulder-width apart and placed directly under your shoulders. The knees are hip-width apart.
Switch to cow pose; when inhaling, bend your back down and tilt your head and neck up. Raise your chin and chest, eyes looking up.
Switch to cat pose; when you exhale, contract your abdomen, arch your back, and hunch your shoulders upward, your eyes looking down towards your navel.
Let your head and chin slide toward the floor so it relaxes without touching your chin to your chest.
In both of these positions, pull your shoulders away from your ears. Inhale and return to cow pose; exhale and return to cat pose.
Do this alternately and repeat it about 10 times. Then, sit straight on your heels to relax.
Note: Do not practice these two poses if you have serious back or neck problems. Do not put excessive pressure on your knees or wrists.
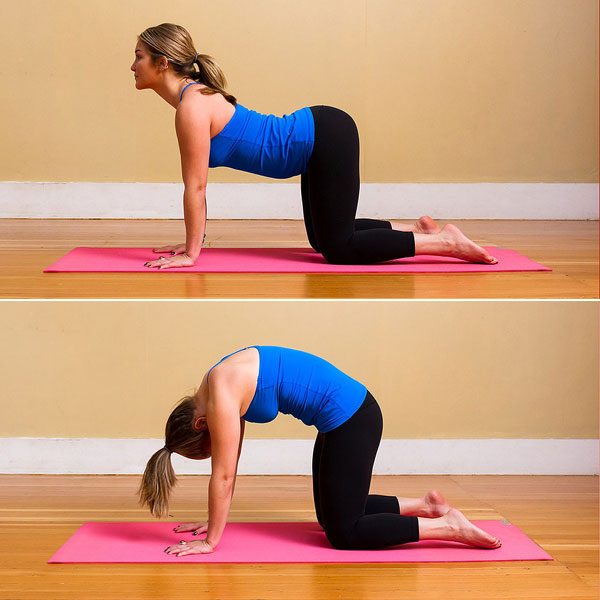
Cat-Cow Pose (Source: Internet)
4. Forward bending position
This is also one of the most basic postures but brings many health benefits, such as soothing the brain, reducing stress, stretching the spine, etc.
Proceed as follows:
Sit straight with your back straight and your legs straight out in front.
Relax your toes, then straighten your back and begin to bend forward. Be sure to keep your back straight while stretching forward.
Hold the position for 5 breaths.
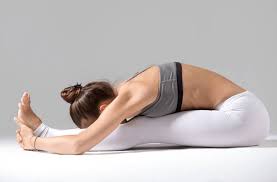
Forward bending position (Source: Internet)
5. Downward-facing dog pose
This is also a highly effective yoga exercise to detoxify the liver. This movement includes 3 steps as follows:
Stand with your feet hip-width apart. Gently bend down to the floor from the waist and place your hands on the floor.
Stretch your arms out in front of your abdomen. Place your hands between your legs, and at the same time, push your hips back to form a downward-facing dog position.
Hold the pose for 5 breaths. Then, return to the resting position and repeat the movement.
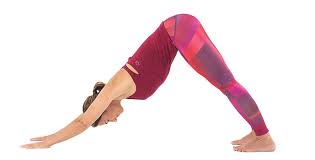
Downward-facing dog pose (Source: Internet)
6. Low stance
The low-stance pose plays an important role in yoga practice and general training sessions. It helps increase strength, flexibility, and balance, making the body better prepared for other exercises.
Proceed as follows:
Start from the downward-facing dog position on the yoga mat.
When breathing in, bring one leg forward and place it on the ground between your hands, knees forming a 90-degree angle.
Lower the front knee and pull the back leg back to stretch the back thigh.
Keep your back straight and push your hips forward to create a stretch in your hip and thigh muscles.
Place your front arm across your chest or raise your arm above the top of your head, forming a straight line from arm to head.
Hold this position for 30 seconds to 1 minute, and breathe deeply and evenly.
Once completed, repeat the same steps with the other leg and side.
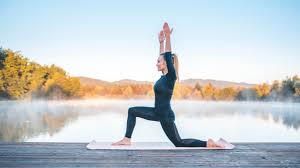
Low Stance Pose (Source: Internet)
7. Bridge Pose
The bridge yoga pose helps gently stretch the back and legs while reducing stress. It reduces feelings of anxiety and headaches and is even one of the most effective therapies to reduce high blood pressure.
Proceed as follows:
Start by lying on your back. You can fold a scarf and place it under your shoulders to protect your neck. Bend your knees and place your feet on the floor so that your feet are as close to your buttocks as possible.
Exhale and lift your hips off the ground. The knees and feet form a straight line perpendicular to the floor. Tighten your elbows. Hold your arms straight up on either side of your waist.
Breathe regularly in this position. Hold for a moment. Inhale as you lower.
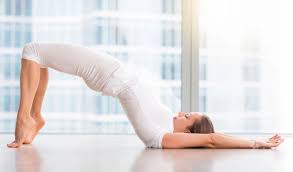
Bridge Pose (Source: Internet)
8. Standing Bend Utanasana
If you are a person who often stands and moves with your feet a lot, this pose will help you stretch your hamstrings and calves and treat insomnia very well.
Proceed as follows:
Prepare in mountain pose.
Inhale and raise your arms.
Exhale, bend forward, and relax your knees so that your entire upper body is close to your thighs.
Keep your knees soft and flexible to help your buttocks point straight up more easily.
Head and shoulders relax, eyes looking over the legs, hands resting loosely on the floor.
Maintainour posture and breathe evenly, deeply feeling each part of your breathing muscles, each in and out breath, and peace in your mind.
Exit the position, inhale, and stretch your arms to lift yourself. Feel the spine lengthen during movement.
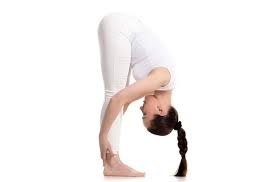
Standing Bend Utanasana (Source: Internet)
9. Baby pose
Baby’s pose not only has the effect of resting and switching between positions but also helps relax the body and relieve stress and fatigue after busy working hours. Therefore, most of the time, this movement is usually done at the end of a workout session or whenever you need to rest to recover.
This exercise helps massage and tone the abdominal organs and acts as an excellent stimulant for digestion while also calming the mind.
The process is as follows:
– Warm up by kneeling on the floor and sitting on your heels. When you feel comfortable, open your knees and hips. Breathe evenly.
– Bend forward between your thighs. Expiratory. Notice that your head and toes touch the floor, and your neck relaxes.
Slowly open your hips and relax between your thighs.
Stretch your arms straight forward, palms facing down, or you can also stretch your arms straight back along your back, palms facing up.
Relax your shoulders. Feel the weight of your shoulders, your belly relaxing on your thighs.
Hold the pose for about 30 seconds to 1 minute or longer, depending on your ability.
Relax, breathe evenly, and slowly lift your body to return to the prepared position
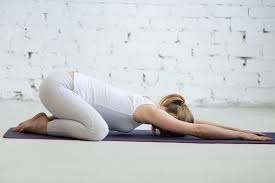
Baby Pose (Internet)
Time to practice yoga for beginners
Choosing the right time to practice yoga will help you practice more effectively. In particular, early morning and late evening are two suitable times to help you practice yoga most effectively.
Early in the morning, when the body’s organs are not yet awake, it is best to spend about 30 minutes on yoga to wake them up and help the body be full of energy and freshness. In the evening, after a tiring day of work, a few yoga movements will help you calm down and have better sleep.
If you practice in the morning, you should practice breathing before performing the movements. If you practice in the afternoon, you should do the exercises before practicing breathing.


